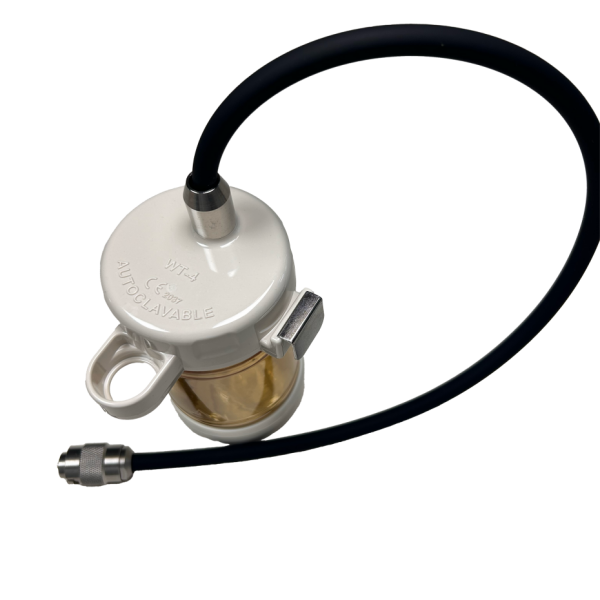
Quick Summary: The water bottle is a pressurized container that supplies water for lens washing during endoscopy. When the bottle, its cap, or the connected air/water valve fails, you lose the ability to clean the lens tip during a procedure. This guide covers how the system works, what fails, and which parts to keep in stock.
How the Water Bottle System Works
The endoscope water bottle is a sealed container, usually made of clear or translucent plastic, that attaches to the light source or processor unit. It holds sterile water used to flush the lens at the distal tip of the scope.
Here is how the system works step by step:
- The bottle is filled with sterile water and sealed with a cap
- Air pressure from the processor enters the bottle through an intake tube
- The pressurized air pushes water up through a dip tube inside the bottle
- Water travels through tubing to the air/water valve on the control handle
- When the operator covers the air/water valve opening and presses the button, water flows to the distal tip to wash the lens
The entire system depends on a sealed pressure path. If any part of this path leaks — the bottle cap, the tubing connectors, or the valve — the system fails. No pressure means no water flow.
Water Bottle Failure Modes
Water bottles are simple parts, but they fail in specific ways that are easy to diagnose.
Cap seal degradation. The rubber O-ring or gasket inside the bottle cap wears out over time. When this happens, air pressure escapes at the cap instead of pushing water through the dip tube. You will notice weak or no water flow during lens washing.
Bottle cracking. Repeated autoclaving and chemical exposure can cause the plastic to become brittle. Hairline cracks in the bottle wall release pressure gradually. The bottle may still look normal on visual inspection but fail under pressure.
Dip tube damage. The dip tube inside the bottle carries water from the bottom of the bottle to the output connector. If the tube is cracked, kinked, or disconnected, water cannot reach the scope. Air may come out of the tip instead of water.
Cross-contamination risk. A bottle that cannot be fully cleaned or has internal scratches that harbor biofilm must be replaced, not repaired. Follow your facility’s reprocessing protocol for water bottle inspection.
Air/Water Valve Failures That Affect the Bottle System
The air/water valve on the control handle is the control point for the entire water delivery system. Even if the bottle is perfect, a failing valve will prevent proper water flow. For a detailed guide on valve types and maintenance, see our endoscope valves guide.
Common valve failures that affect the water bottle system:
Valve piston wear. The internal piston seals air and water channels. When the piston wears, air leaks between channels. You get air bubbles mixed with water, or air when you expect water.
O-ring failure. The valve body contains small O-rings that seal the air and water paths. When these dry out or crack, pressure leaks at the valve body instead of reaching the bottle.
Spring fatigue. The return spring inside the valve loses tension over time. A weak spring means the valve does not fully close, allowing continuous slow air leak that reduces bottle pressure.
Symptom and Cause Table
| Symptom | Likely Cause | Check First |
|---|---|---|
| No water flow at distal tip | Bottle cap leak, empty bottle, or valve piston worn | Cap seal and bottle water level |
| Weak water flow | Partial cap leak, low processor air pressure, or kinked tubing | Cap O-ring and air pressure setting |
| Air bubbles in water stream | Valve piston wear or dip tube crack | Air/water valve condition |
| Water leaks at bottle connection | Cap gasket failure or bottle thread damage | Replace cap or bottle |
| Continuous air leak from bottle | Cap not seated properly or cracked bottle | Re-seat cap, inspect bottle for cracks |
| Water flow does not stop | Valve spring fatigue or piston stuck | Replace air/water valve |
| Intermittent water flow | Loose dip tube or partial blockage | Check dip tube connection |
For more symptom-based troubleshooting across all endoscope systems, see our endoscope troubleshooting guide.
Resistant Caps: What They Are and When to Replace
Resistant caps (also called reprocessing caps or leak test caps) are specialized caps that seal the water bottle port and other openings during leak testing and reprocessing.
They are not the same as regular water bottle caps. Resistant caps are designed to withstand the chemicals and temperatures used in automated endoscope reprocessors (AERs).
When to replace resistant caps:
- The cap no longer creates a tight seal during leak testing
- The cap material shows visible swelling, cracking, or discoloration
- The cap fails to maintain pressure during the leak test cycle
- Your facility’s preventive maintenance schedule requires replacement at a set interval
A failed resistant cap during leak testing can produce a false positive — the scope appears to leak when it does not. Before sending a scope for repair based on a leak test failure, try a new resistant cap first.
Compatible vs. OEM Parts
Water bottles, caps, and valves are available as both OEM parts (from the scope manufacturer) and compatible replacements from suppliers like Endotec.
Compatible parts are manufactured to the same dimensions and material specifications as the original. For water bottles and caps, the critical factors are:
- Thread size and pitch (must match the processor connection)
- Bottle volume (must match the original capacity)
- Cap seal diameter (must match the bottle opening)
- Material compatibility with your reprocessing chemicals
Compatible water bottles and valve components typically cost 40-60% less than OEM equivalents. Browse our valves and accessories catalog for available parts.
Which Spare Parts to Stock
For a well-prepared biomedical engineering department, keep these water bottle system parts on hand:
- Water bottles — at least 2 per processor, so one is always available during reprocessing
- Bottle caps with O-rings — caps wear faster than bottles; keep 4-6 spare caps
- Air/water valve sets — complete valve assemblies for your most common scope models
- Resistant caps — 2-3 per scope model for leak testing
- O-ring kits — replacement O-rings for both bottle caps and valve bodies
Having these parts in stock means you can fix water delivery problems in minutes instead of waiting days for parts to arrive.
Frequently Asked Questions
How often should water bottles be replaced?
Replace bottles when you see cracking, cloudiness that does not clean off, or when the bottle fails to hold pressure even with a new cap. Most facilities replace bottles every 6-12 months as part of preventive maintenance, but inspect them at every use.
Can I use a water bottle from one processor brand on another?
No. The thread size, dip tube length, and connector type are specific to each processor or light source model. Always match the bottle to your specific equipment.
What causes a water bottle to lose pressure quickly?
The most common cause is a worn cap O-ring. Replace the O-ring or the entire cap. If the new cap still does not hold pressure, check the bottle for hairline cracks by submerging it in water and pressurizing it — bubbles will show the leak location.
Should I replace the air/water valve when I replace the water bottle?
Not necessarily. They are separate components with different wear patterns. Replace the valve when you see symptoms of valve failure (air/water mixing, continuous leak, weak flow with a good bottle). If the bottle was the problem and the valve tests fine, replacing the bottle alone is sufficient.
Need Water Bottle or Valve Parts?
Send us your processor model and scope model numbers. We will match the correct bottle, cap, and valve parts for your equipment.
Browse our valves and accessories catalog or contact our team for a quote. We ship globally with fast turnaround.
